How to Get Exact Color in Product Photography
The goal of product photography is to guide all potential purchasers. It guides them through the entire sales process, from product knowledge through prospecting, becoming a customer, and making a purchase.
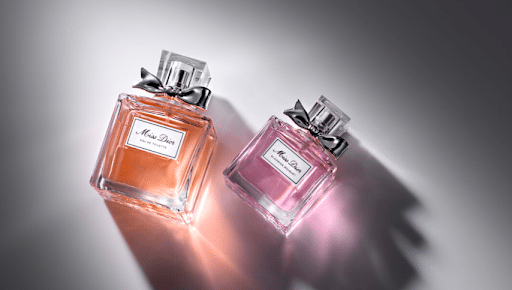
The most crucial aspect of product photography is capturing the exact color of the products. Color-correction can be used to provide a precise color in product photography. You can adjust the contrast, white balance and correct the brightness.
When you don’t execute your editing properly, your products won’t seem the same in person, and 22 percent of them will be returned. It will negatively influence your business if clients return things because they differ from the photography.
How to Get Exact Color in Product Photography
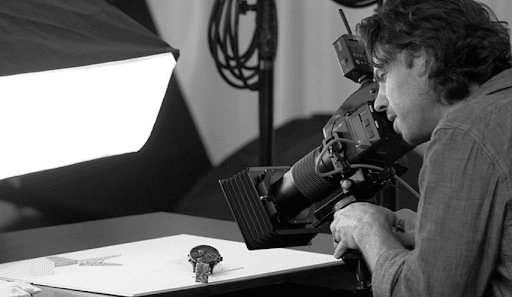
Product photography is the best possible way to prompt products. When your photography is more potent than the competitors, it can positively impact customers buying decisions.
Learning proper Photoshop is a matter of time. If you’re looking for an easy way, then you can hire the best photo color correction company at minimum cost. But you can try it yourself too. Here are some tricks and tips that you can follow to get the exact color in product photography.
-
White Balance
White balance is a function that guarantees that the camera takes photographs that are a close match to the product’s actual color. It can correct the color issues in your digital camera and control how colors are captured in assorted kinds of lights. If you have a digital camera, you can select the following standard white balance presets-
- Auto: In this setting, the camera examines the scene and selects a color temperature that will be the best.
- Tungsten: You can use this setting in indoor photography under incandescent light. As tungsten light gives an orange tint, this setting can cool off the colors adding together with a little blue.
- Fluorescent: Employ this setting while capturing photos indoors with fluorescent lights. It can add a little orange to warm up and remove a blue tint.
- Daylight/Sunlight: This is a neutral white balance that you can use while shooting outside under sunlight.
- Cloudy: This setting gives a slightly warmer look than the daylight, which is ideal for overcast days.
- Flash: This white balance warms up the color of your product photographs.
- Shade: With the shade settings, you can add a little orange tint to add a good amount of warmth to the colors.
- Manual Settings: Some cameras allow setting custom white balances with the aid of a white card. While photographing with manual settings in the light, your camera will automatically adjust the setting by ensuring that the card in the final image is entirely white. This is the most precise way to adjust the white balance in a particular environment.
-
Contrast
Using contrast in your product photography, you can be affected by the light intensity along with the quality of your image. This setting makes the lighter parts brighter as well as darker parts more so. To get great compositions, you can use contrast in your editing.
-
Exposure
This setting works like the contrast, but the fact is it controls the whole picture, not specific areas. While you increase the exposure settings, it makes the overall image brighter. In most editing software, they add exposure as brightness.
-
Saturation
Saturation is equally essential as exposure or contrast. If you want to save more time, it’ll be better to contrast before correcting the saturation. Remember that too much saturation can make your photographs unrealistic and over-edited.
-
Filters and Presets
These settings allow customizing the style of your photographs but may not apply perfectly to every single one. Filters work to change basic settings and create a distinct look in one click. You can also make manual adjustments after doing a preset to your image.
-
Color Match
Doing some serious white balance editing to your photos, you may seem to have some difficulties with neons, pinks, and reds. After doing the retouching, check the final products under daylight bulbs.
How Do I Keep Colors Accurate During Product Photography?
If you have a good sense of photography, you don’t need to break the bank to get the accurate color of your products. To capture the colors precisely, you have to use a gray card. This is intended to adjust the exposure along with white balance settings to keep colors accurate. Here are some more to do-
-
Shoot in Raw
If you take raw photographs, then the colors can be easily adjusted. The original RAW file is always available for alterations later because the edits are made in a non-destructive format. This comes in handy when you need to edit photographs in various ways at various points in your photography career.
-
Use Kelvin WB Mode on Your Camera
If you don’t have any space in your flash drive, try to capture images with Kelvin White Balance rather than the Auto White balance. As every camera doesn’t have this setting, view your manual to determine the specific menu option and how to alter the value. Kelvin allows you to change the white balance in-camera rather than after the fact.
-
Use a Good Display Screen/Monitor
As cheap the screen as small the color range is. You don’t want your image to be confined to this format. If you’re retouching images, you’ll need a screen that’s 99 percent sRGB at the very least. 100 percent Adobe RGB-capable screens are cheaper now. However, because most web media is in the sRGB format, sRGB is entirely enough.
-
Calibrate Your Monitor
Not everyone understands how important calibrating the monitor is. When you see your images in a color-calibrated medium, your screen can be purple, but it’ll end up green.
-
Edit in a Color-Neutral Workspace
Sit in a bright sunlight flooding room, which will help you will edit cooler. The best environment is a deep dark room, which will help you not destroy any colors. However, it can cause a headache working on a screen in a dark room.
-
Use Multiple Devices to Spot Check Color
If you want to double-check the color tone, use another device to see if the edit is perfect. Just send your images to other devices, and you’ll get an idea of how people will see your pictures.
Wrapping Up
Removing all the flaws from your pictures is an essential thing. But the color correction is an integral part of photo editing. To get the exact color in your product photography, you must correct the mentioned things like contrast, saturation, or exposure. When you’re dealing with getting the exact color, you can do all these settings and make your photos more attractive. They will help you to get the color that matches the real-life item.